
In the world of digital security and privacy, knowing how to completely wipe a hard drive on Windows is essential. Whether you’re planning to sell or donate your computer, repurpose a drive, or just want to ensure that sensitive information is irreversibly erased, wiping a hard drive ensures that your personal files won’t fall into the wrong hands. This guide will take you through a detailed, step-by-step process on how to completely wipe a hard drive on Windows, ensuring that your data is securely erased and unrecoverable.
Why Wiping a Hard Drive Matters
When you delete a file on your Windows system or even format your hard drive, the data is not truly erased. Instead, the system merely marks the space occupied by those files as available for use. With the right recovery tools, these files can be restored, posing a serious risk if sensitive data like personal information, financial records, or business documents are involved.

A proper hard drive wipe ensures that no traces of your data remain on the drive by overwriting it with random information, making file recovery impossible. For those who handle sensitive data, this extra step is crucial.
Methods for Wiping a Hard Drive on Windows
There are several methods to wipe a hard drive on Windows, ranging from built-in system tools to third-party software designed for more thorough and secure erasure. Below are the most effective methods to accomplish a full wipe.
1. Using Windows Built-in Tools
For most users, Windows provides built-in tools that can perform a full drive wipe. These tools are sufficient for basic wiping tasks but may not offer the level of security required by those with extremely sensitive data.
1.1 Using the Reset This PC Feature
Windows 10 and 11 come with a built-in “Reset This PC” feature that not only reinstalls the operating system but also offers an option to completely wipe the drive. This is a straightforward and beginner-friendly method.
Steps:
- Open Settings: Press
Windows + Ito open the Settings menu. - Navigate to Update & Security: Select Update & Security from the settings menu.
- Choose Recovery: On the left-hand panel, select Recovery.
- Reset This PC: Under the Reset this PC section, click on Get started.
- Choose Full Wipe: Select Remove everything when prompted. This option will remove all your files, settings, and apps.
- Clean the Drive: You’ll be given an option to just remove your files or fully clean the drive. Choose Fully clean the drive to ensure that all data is irreversibly erased.
- Start the Process: Click Next, and then Reset to begin the wipe process. This can take several minutes or hours, depending on the size of your hard drive.
Note
- The “Reset This PC” method is effective but might not be entirely foolproof for sensitive data. If the hard drive will be reused by others, you may want to consider more secure methods.
1.2 Using Disk Management (For Secondary Drives)
If you have a secondary drive (not your system drive) that you wish to wipe, you can use the Disk Management tool built into Windows.
Steps:
- Open Disk Management: Press
Windows + Xand select Disk Management from the menu. - Locate the Drive: Find the drive you want to wipe. Make sure this is a secondary or external drive, as you cannot format your system drive while Windows is running.
- Right-click and Format: Right-click on the partition of the drive you want to wipe, then select Format.
- Choose File System: Choose the file system (usually NTFS for Windows) and leave the Allocation Unit Size as default.
- Uncheck Quick Format: Make sure to uncheck the Perform a quick format option to ensure that data is overwritten.
- Start the Format: Click OK to start the process.
Note:
- This method erases all data but does not offer full security. Data could still be recovered with specialized software unless you use third-party tools to overwrite the drive multiple times.
2. Using Third-Party Tools for Secure Wiping
For users who require higher levels of data security, such as when selling a computer or handling sensitive business data, third-party software provides more comprehensive wiping options. These tools often use military-grade algorithms to overwrite the drive multiple times, ensuring no data can be recovered.
2.1 CCleaner Drive Wiper
CCleaner is widely known for its system cleaning capabilities, but it also offers a Drive Wiper feature that allows for secure data deletion.
Steps:
- Download CCleaner: Visit the official CCleaner website and download the free version.
- Install and Open CCleaner: Install the program and open it.
- Navigate to Drive Wiper: In CCleaner, go to Tools and select Drive Wiper.
- Choose Drive to Wipe: Select the drive or partition you wish to wipe.
- Choose Security Level: CCleaner provides different levels of wiping, ranging from a single overwrite to multiple overwrites for enhanced security.
- Start Wiping: Select Wipe to begin the process.
Note:
- CCleaner’s Drive Wiper is user-friendly but may not be as thorough as DBAN or other military-grade solutions. It’s great for secondary drives or external storage devices.
2.2 DBAN (Darik’s Boot and Nuke)
DBAN is one of the most well-known and trusted tools for completely wiping a hard drive. It’s a bootable tool that runs outside of your Windows operating system, making it a powerful option for secure data destruction.
Steps:
- Download DBAN: Visit the official DBAN website and download the tool as an ISO file.
- Create Bootable USB: Use software like Rufus to create a bootable USB drive from the DBAN ISO file.
- Boot from USB: Restart your computer and boot from the USB drive by pressing
F12(or another key depending on your motherboard) during startup. - Run DBAN: Once booted into DBAN, select the drive you want to wipe.
- Choose Wiping Method: DBAN offers several data destruction methods, including the DoD Short and DoD 5220.22-M, which overwrite data multiple times. Choose a method based on how secure you need the wipe to be.
- Start Wipe: Begin the process and wait for it to complete. Depending on the drive size and the wiping method, this can take hours.
Note:
- DBAN is effective but only works on non-system drives. It will not work for wiping individual partitions or external drives without erasing everything.
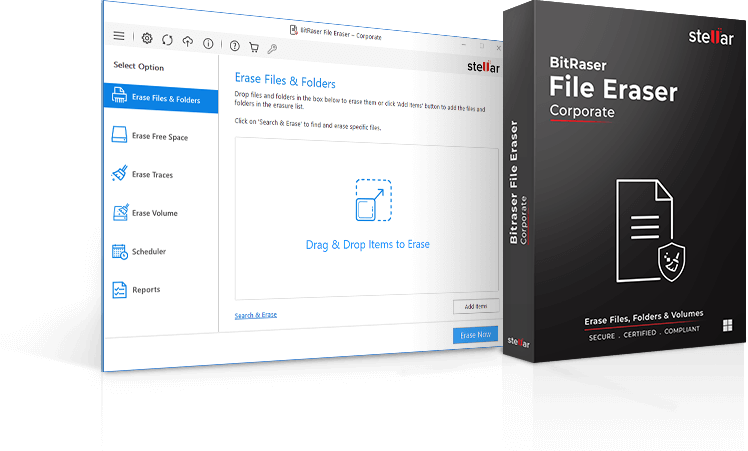
2.3 BitRaser
For businesses and professionals, BitRaser provides an advanced level of wiping, complying with data destruction standards like GDPR, HIPAA, and ISO 27001. It’s a highly secure tool offering certified wiping processes.
Steps:
- Download BitRaser: Go to the official website and download the tool.
- Create Bootable Media: Like DBAN, BitRaser requires you to create a bootable USB or CD.
- Boot from Media: Restart your system and boot from the USB drive.
- Select Wiping Algorithm: BitRaser supports over 20 international data wiping algorithms, including the U.S. DoD 5220.22-M, the NIST 800-88 Clear, and more.
- Wipe the Drive: Select the drive you wish to erase and start the process.
Note:
- BitRaser offers a high level of security but comes at a cost. It’s typically used in enterprise environments or for those needing certified erasure.
3. Using Command Prompt (Diskpart)
For those who prefer more control and are comfortable with command-line interfaces, Windows’ Diskpart command offers a built-in way to wipe drives, including system drives (when booting from external media).
Steps:
- Open Command Prompt: Press
Windows + R, typecmd, and press Enter to open Command Prompt. - Launch Diskpart: Type
diskpartand press Enter. - List Disks: In Diskpart, type
list diskto see all connected drives. - Select the Disk: Type
select disk X, where “X” is the number of the drive you wish to wipe. - Clean the Disk: Type
clean alland press Enter. This will write zeros to every sector of the drive, effectively wiping all data. - Exit Diskpart: Once complete, type
exitto close Diskpart.
Note:
- Diskpart is a powerful tool and should be used with caution, as it doesn’t ask for confirmation. Be sure to select the correct disk.
4. Encrypt the Drive Before Wiping (Bonus Layer of Security)
If you want to add an additional layer of security before wiping your drive, consider encrypting it first. By encrypting the data before performing a wipe, even if someone were able to recover the data, it would be unreadable.
Steps:
- Use BitLocker: Windows has built-in encryption called BitLocker, which is available on Pro and Enterprise editions of Windows.
Steps to Use BitLocker:
- Enable BitLocker:
- Open the Control Panel and navigate to System and Security.
- Click on BitLocker Drive Encryption.
- Select the drive you want to encrypt and click Turn on BitLocker.
- Choose How to Unlock Your Drive:
- You can choose to unlock the drive with a password, a smart card, or automatically unlock the drive when you’re logged into your Windows account.
- Backup Your Recovery Key:
- BitLocker will prompt you to save a recovery key. This key is essential for recovering access to your drive if you forget the password. You can save it to your Microsoft account, a USB drive, or print it.
- Start the Encryption:
- Once you choose your unlock method and save the recovery key, select Next and then Start Encrypting. The process may take some time, depending on the drive size.
- Wipe the Drive:
- After encryption is complete, follow any of the above methods to wipe the drive. Since the data is now encrypted, even if it is recovered, it will appear as random data.
Conclusion
Knowing how to completely wipe a hard drive on Windows is a critical skill for ensuring your data remains private and secure. Whether you’re selling your computer, donating it, or simply repurposing a hard drive, understanding the available methods—such as using Windows’ built-in tools, third-party software like Bitraser or even the command prompt—will help you make an informed decision on how to proceed.
Key Takeaways:
- Wiping vs. Deleting: Simply deleting files does not erase them. Use proper wiping methods to ensure data cannot be recovered.
- Choose the Right Method: Depending on your needs (basic wiping vs. secure wiping), select the method that best fits your situation.
- Backup Data: Always back up any important data before wiping a drive. Once wiped, recovery is often impossible.
- Secure Your Data: If handling sensitive information, consider encrypting the drive before wiping for an additional layer of security.
With this comprehensive guide, you can confidently wipe a hard drive on Windows, knowing that your data will be secure from prying eyes. Whether you choose to use the built-in tools or third-party applications, ensuring that your data is completely erased is an essential part of digital security in today’s world.